Builder Hub: Set up Multi-Camera
Multi-camera setup lets you add your camera angles, then cut between them on one low-latency pipeline. Viewers watch one continuous video while you decide which camera is on air.
The page has two sides:
- Set up your cameras works on your own streams. It needs an account.
- See it with sample cameras plays four camera angles we stream for this demo. Anyone can open it, guests included.
In the Builder Hub menu, open Build › Stream › Set up multi-camera.
This page covers the tool inside the Builder Hub. To build multi-camera switching into your own application, see the Real-Time API docs:
- Multi-Camera Switching: how it works, step by step, with code examples
- Multi-Camera Switching: API Reference: every endpoint, field, event and error
- Real-Time API: base URL and authentication
Before you start
| You need | Details |
|---|---|
| Account | A free or production account. Guests see the sample instead. |
| Streams | Two or more streams of your own as camera angles, or let the setup create them |
| Encoders | One encoder per camera angle, sending RTMP |
Who can use it
| Account | What happens |
|---|---|
| Guest | Set up multi-camera is marked Sign in in the menu, and clicking it opens the sign-in form. A link straight to the page opens the sample. On the sample, Try it with your own content opens the free sign-up. |
| Free account | Both sides. The sample is also listed under Demos › Stream › Multi-Camera Preview. |
| Production account | The setup. The sample opens from the link on the setup page. |
Set up your cameras
The page opens the Multi-Camera Switch tool. You're already signed in with your Builder Hub account, so it opens ready to use. Learn how it works at the top sums up what you can do: pick your own streams as camera angles, group them into one room, and switch between them live, with a log of every switch.
The tool walks through four steps:
-
Connect. Your Builder Hub sign-in carries over, so this step is already done.
-
Camera Angles. Choose How many camera angles? Then:
- Create new makes a fresh stream for each angle.
- Use existing lets you pick streams your organisation already has. Refresh streams reloads the list.
Then click Configure Streams.
-
Stream Group (Room). Bind the angles into one group. Enter a Group Name, or leave it blank to get one generated, and click Create Stream Group. Reuse a name to pick up a group you made earlier: its angles are replaced, and whatever it has on air stays on air.
-
Control. The player shows what viewers see. Click a camera, or press 1 to 6, to cut. The Event log lists every switch.
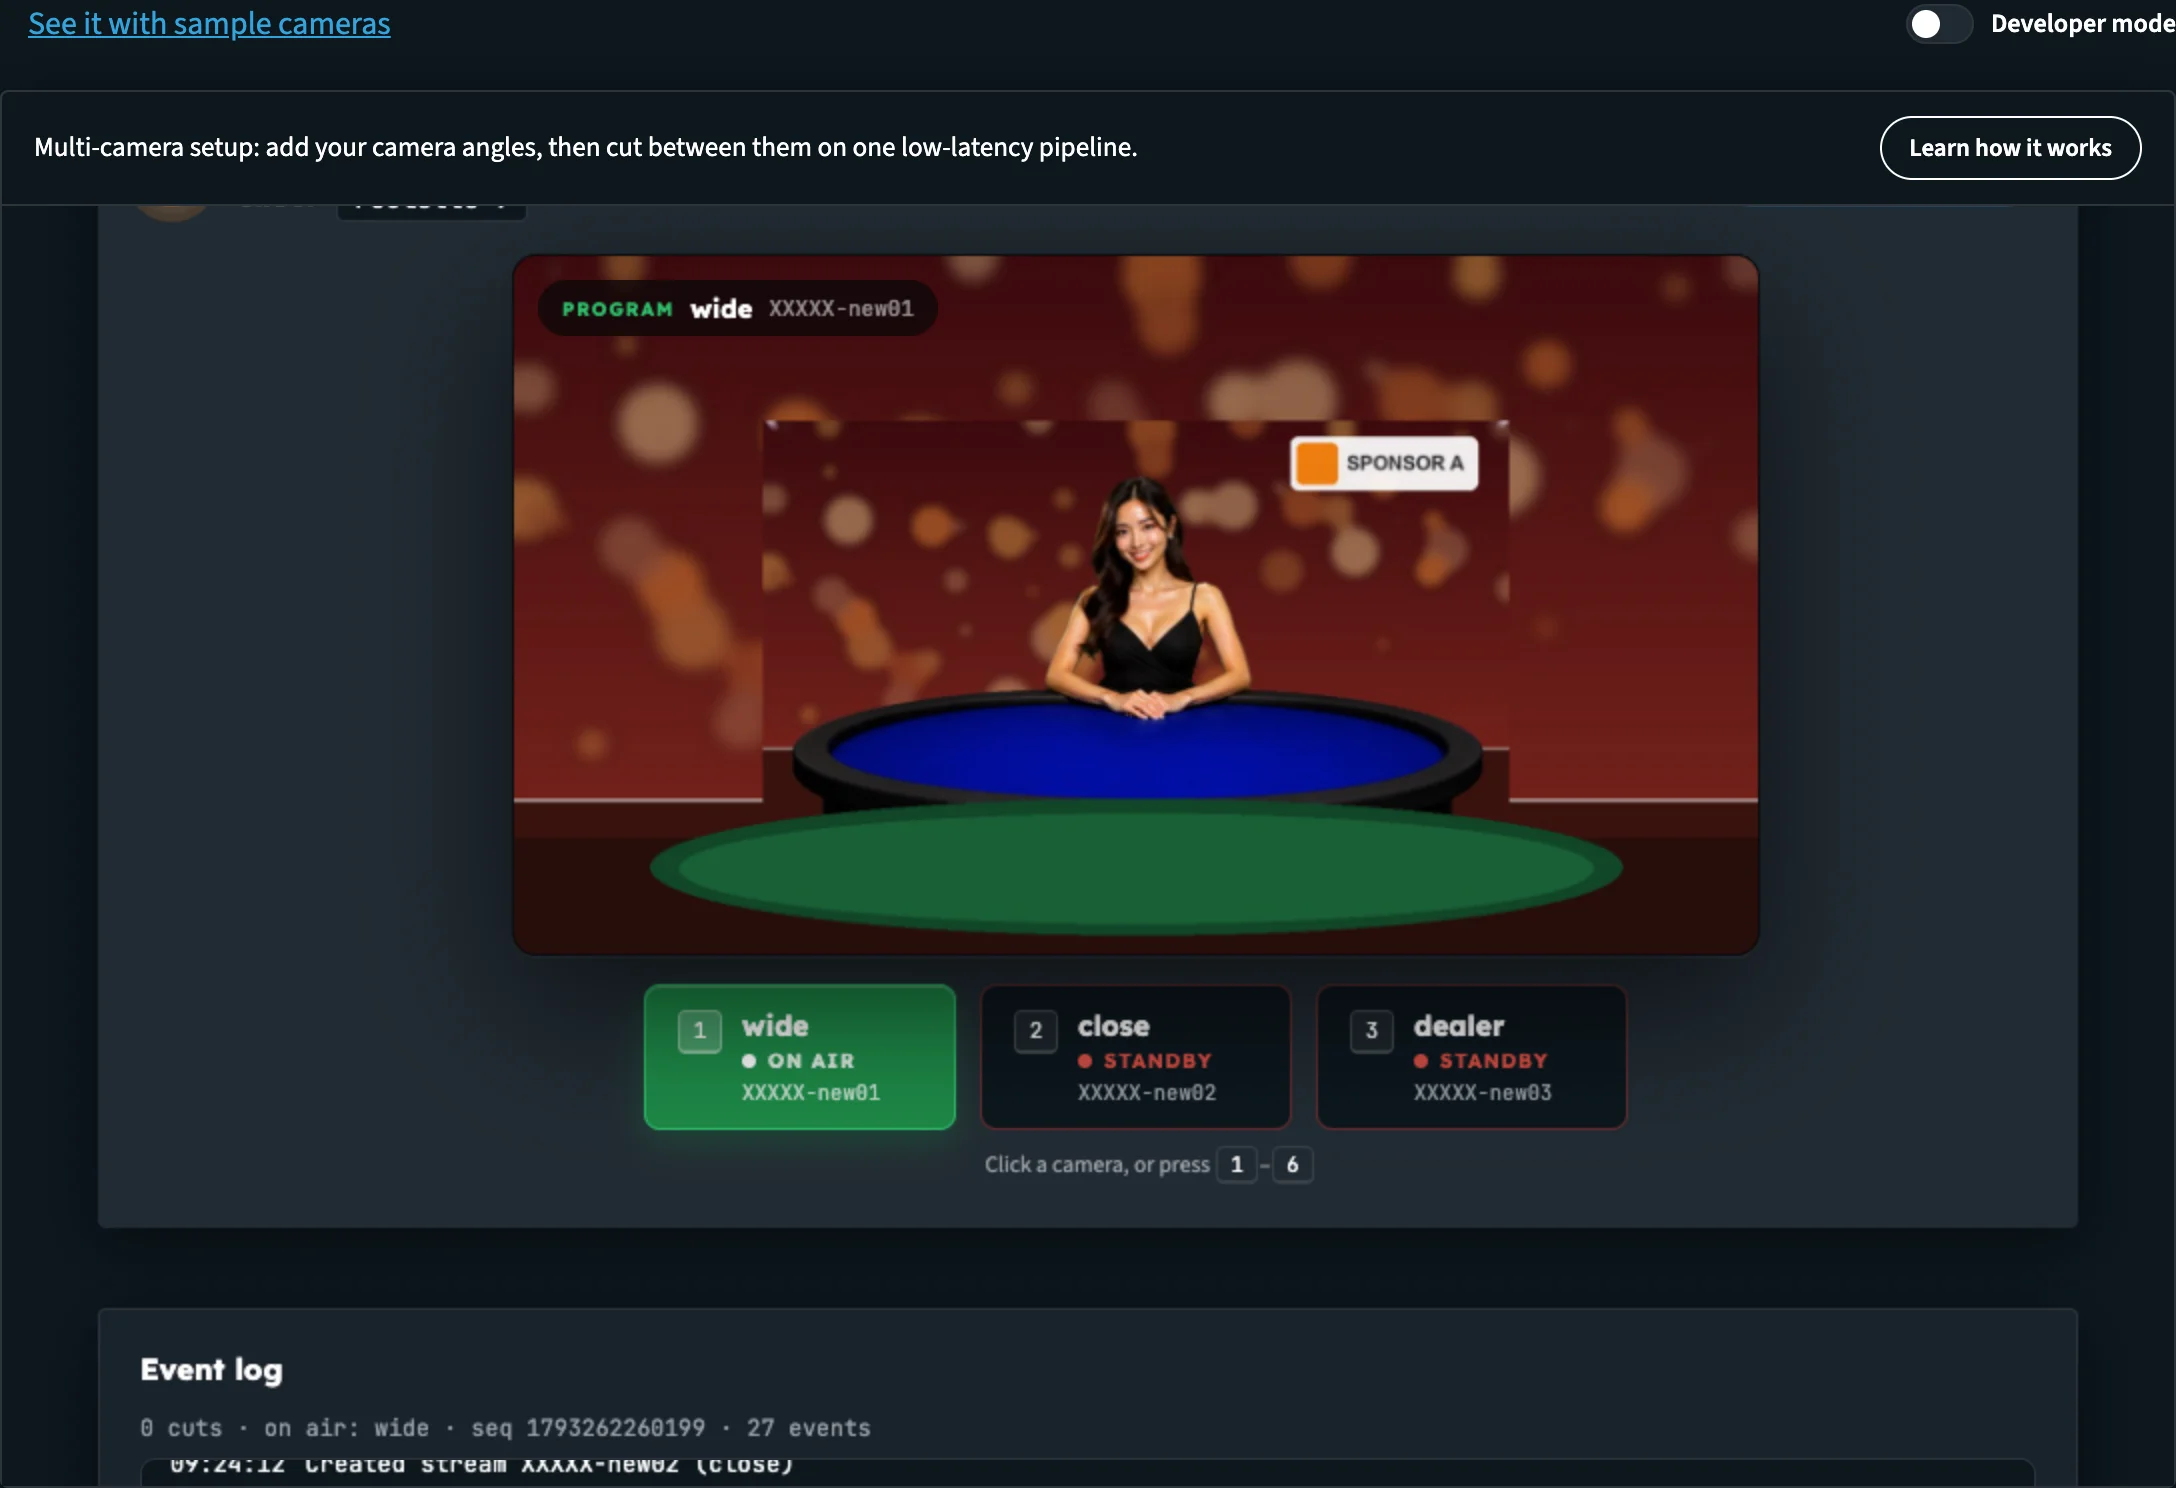
Your own angles, grouped and switched live.
In Control, Copy player link gives you the link to the player for your viewers, and How it works & API shows the ingest details and the exact API calls for your group.
For every step of the tool in detail, see Try it in the demo in the Multi-Camera Switching docs.
See it with sample cameras
On the setup page, click See it with sample cameras above the tool to open Multi-Camera Preview. The bar reads Sample content: four camera angles we stream for this demo. Signed in, it adds Nothing here touches your account.
Here you can see:
- four camera angles playing side by side as live inputs
- a program output player showing the angle on air
- cuts between angles: click an input, press 1 to 4, or Take Next (or press Space)
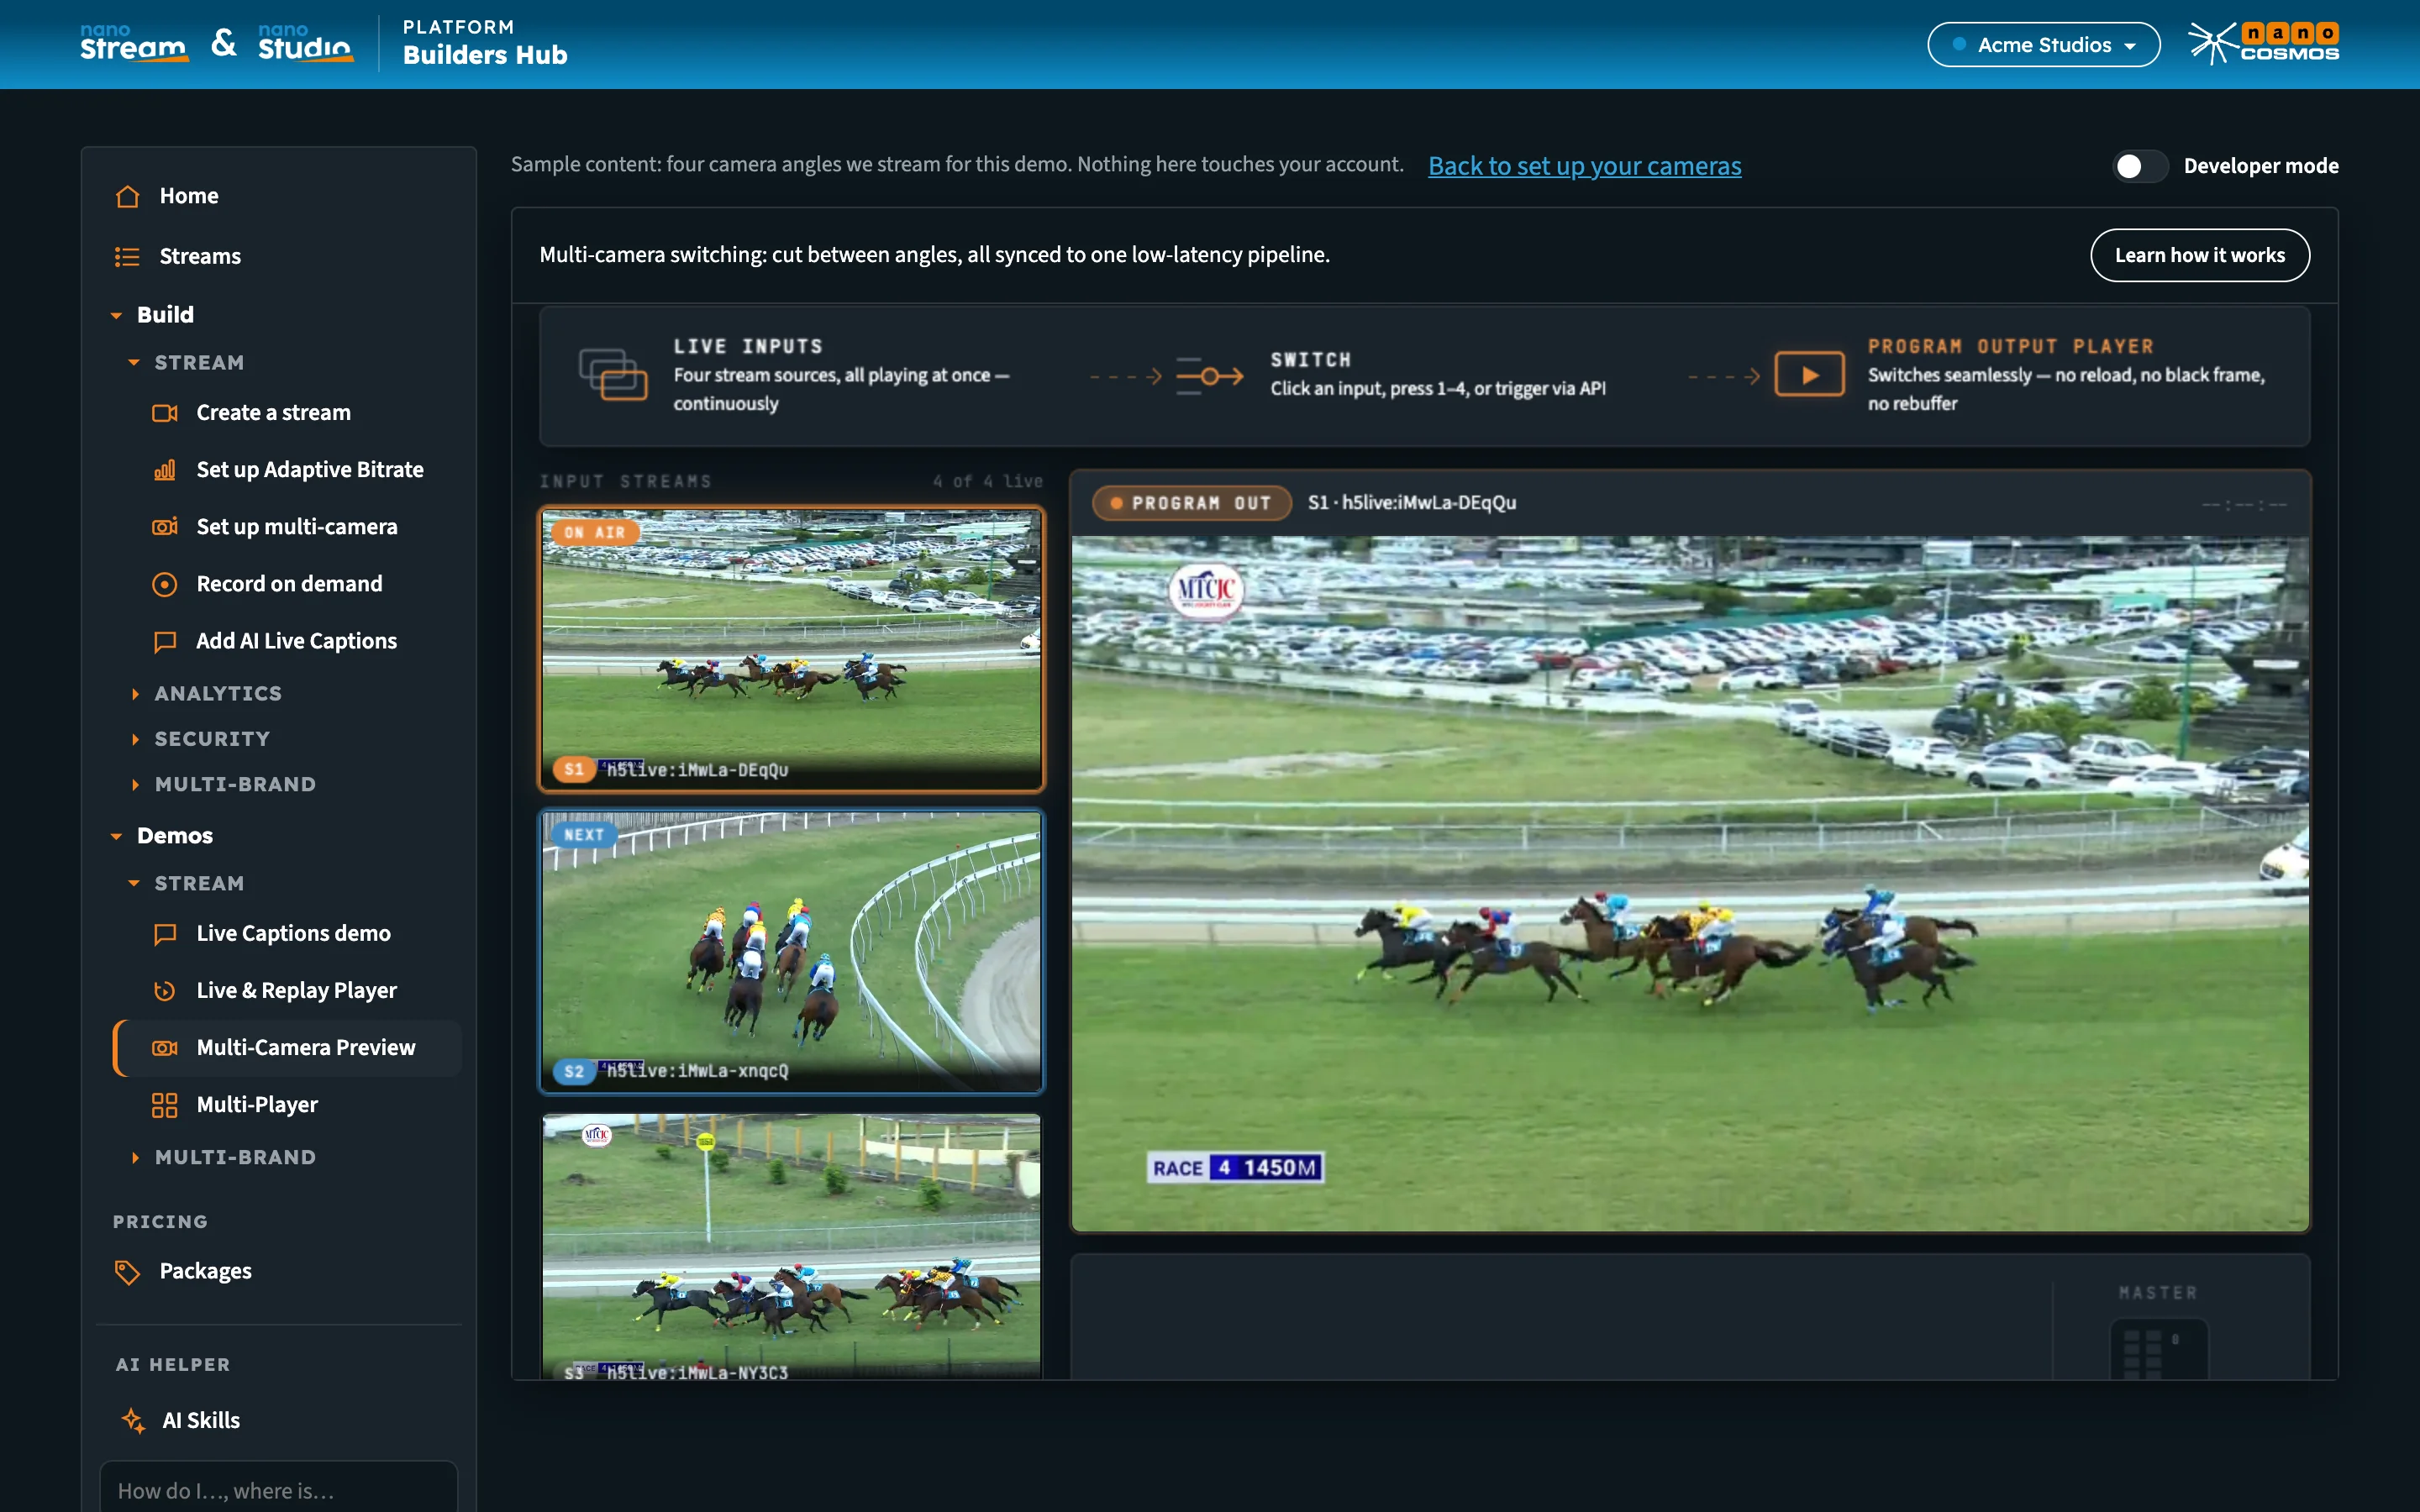
The sample: four angles we stream, cut to one program output.
To go back, click Back to set up your cameras. As a guest, the link reads Try it with your own content and opens the free sign-up.
Build it into your app
Everything the tool does is available through the Real-Time API: create a stream group, embed the player, and switch angles with one call. See Multi-Camera Switching.
Next steps
- Multi-Camera Switching: the API behind the tool
- Multi-Camera Switching: API Reference: every endpoint, field, event and error
- Demos: the Multi-Camera Preview and the other samples
- Accounts & Access: what each account type gets