Builder Hub: Record on Demand
On-Demand Recording records a live session while you're live, and plays it back on demand. You start and stop each recording yourself, and each recording produces its own file.
In the Builder Hub menu, open Build › Stream › Record on demand.
This page covers the tool inside the Builder Hub. To start and stop recordings from your own application, see the Real-Time API docs:
- On-Demand Recording: start and stop recordings with REST calls, with code examples
- Real-Time API: base URL and authentication
Before you start
| You need | Details |
|---|---|
| Account | A free or production account with recording on |
| Encoder | OBS, vMix, ffmpeg or a hardware encoder that sends RTMP |
| Stream (optional) | An existing stream of yours, or let the tool create one |
Who can use it
| Account | What happens |
|---|---|
| Guest | Record on demand is marked Sign in in the menu, and clicking it opens the sign-in form. A link straight to the page opens the free sign-up. To see a recording played back without an account, open the Live & Replay Player demo. |
| Free account | Works. |
| Production account | Works when recording is on for your organisation. If it isn't, the menu item is marked off. |
Learn how it works at the top of the page sums it up: pick a new or existing stream of yours and watch it live, start and stop a recording, then replay the file on demand. It also links to Open the Live & Replay Player, which shows a recording played back with sample content.
Step 1: Sign in
The page opens the On Demand Recording tool. Your Builder Hub sign-in carries over, so Sign in shows Signed in as … and is already done.
Step 2: Your stream
Choose one of these:
- Click Create a stream. A new stream is created recordable.
- Paste a stream ID into Or use an existing stream and click Use this stream.
The step then shows Stream ready:
- Copy the Ingest URL (for OBS / ffmpeg) and the Stream key with their Copy buttons.
- Start your encoder with them. The stream plays in the player below once it's live.
To pick another stream, click Change on the step.
Step 3: Watch it live
Live player plays your stream. Open in new tab ↗ opens the player on its own. While anything records, the player gets a red frame and a Rec tag.
Step 4: Record
Under the player:
- Optionally type a Recording label: letters, digits and
_, up to 64. Leave it empty for an automatic name. - Click Start recording. The recording shows with a running clock.
- Click Stop recording when you're done.
In the Builder Hub, each recording stops after 30 seconds, and the file then appears under On Demand Recording. To record for as long as you need, use the On-Demand Recording API.

Your stream playing live while a recording runs.
Step 5: Play back your files
On Demand Recording lists your recordings:
| Row | What it is |
|---|---|
| Session · Full session · auto | The automatic full-session recording. It starts when the stream goes live and stops when it ends, and can't be started or stopped here. It reads Inactive when it's off for the stream. |
| Recorded files | Every file you recorded, numbered, with Play and Copy link |
A new file shows Processing recording: the file appears shortly. About a minute after you stop, it's ready. Click Play to watch it, or Copy link to share it.
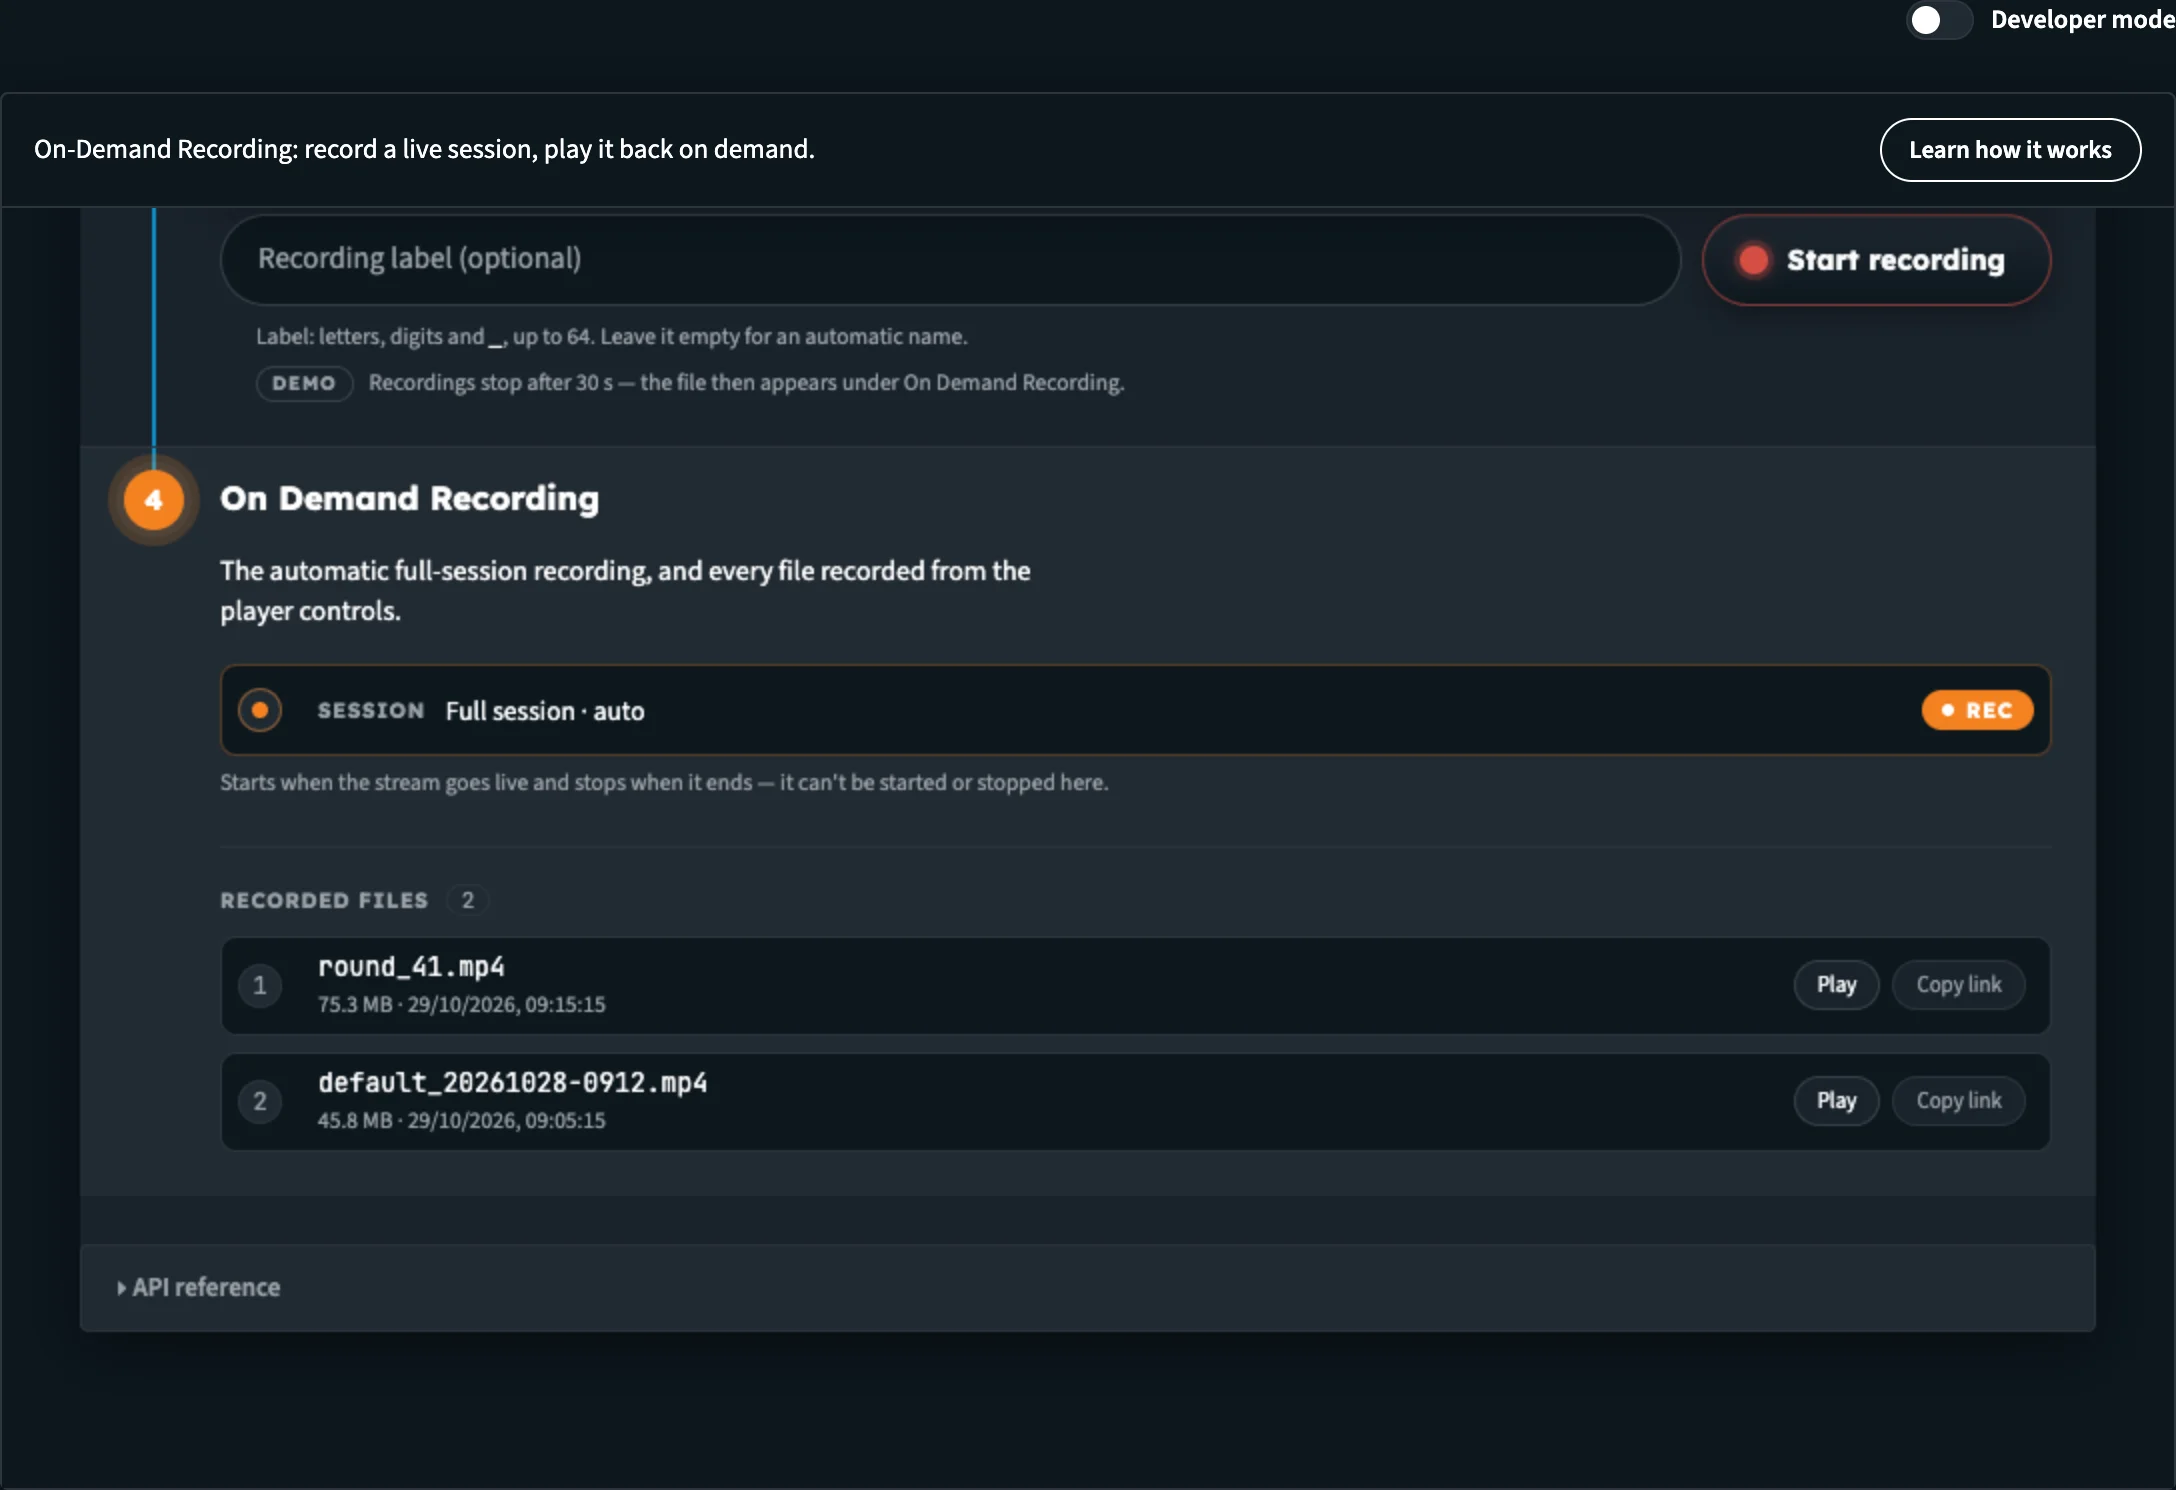
Every recording is its own file, ready to play or share.
Build it into your app
Start and stop recordings from your own application with the Real-Time API. See On-Demand Recording.
Next steps
- On-Demand Recording API: the API behind the tool
- Demos: the Live & Replay Player
- Create a stream: go live from your browser