Live Captions
Live Captions convert speech into readable text in multiple languages in real time to support accessibility and compliance. This feature improves accessibility and keeps viewers engaged, especially for streams with spoken content, in sound-off environments, or for users who are hard of hearing.
Through the nanoStream Cloud Dashboard, you can easily set up, manage, and integrate Live Captions into your playback environment. This guide explains how to enable, configure, and use Live Captions from within the dashboard.
How Live Captions Work
Detailed explanation of the real-time caption generation process and low-latency delivery.
Supported ASR Engines & Languages
Overview of available engines and the full list of source and target languages, including regional variants.
Managing Live Captions via API
Learn how to control captions programmatically using the bintu API, including adding, editing, and removing captions.
To make use of Live Captions, it must be explicitly enabled for your organization. Activation may be subject to additional pricing or service terms.
You can verify whether this feature is available by navigating to dashboard.nanostream.cloud/organisation in your dashboard.
In the Enabled Packages section, locate the entry for Live Captions. If it shows Upgrade needed, please contact us.
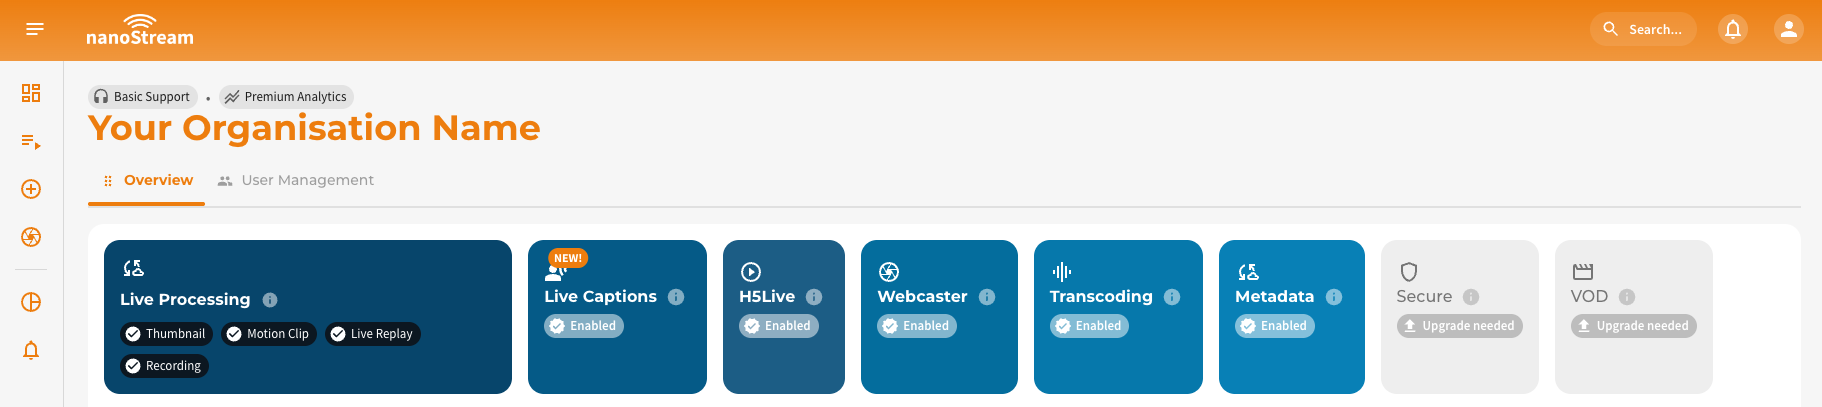
To activate Live Captions or learn more about available plans, feel free to reach out via nanocosmos.net/contact. We're happy to assist you in finding the best setup for your use case.
Live captions are only available for secure playback. Therefore, by enabling live captions, you will also need to enable the secure feature. Please reach out to our sales team via nanocosmos.net/contact or by email at sales(at)nanocosmos.net if you have any questions.
To learn more about secure playback, visit the dedicated article Secure Playback (H5Live).
Add Live Captions to a New Stream
When creating a new stream in the dashboard, live captions can be configured directly.
 Screenshot: Adding live captions during stream creation
First, select the desired live caption engine. Then specify the language of the audio (i.e., the language spoken during the stream). Next, select one or more target languages in which the captions should be displayed. Live Captions support translation and can output text in multiple target languages simultaneously.
Once the engine and languages are configured, click Create stream, this saves the settings as part of the stream configuration. From that point, Live Captions will automatically activate as soon as the stream goes live, with the first lines typically appearing within 5–7 seconds.
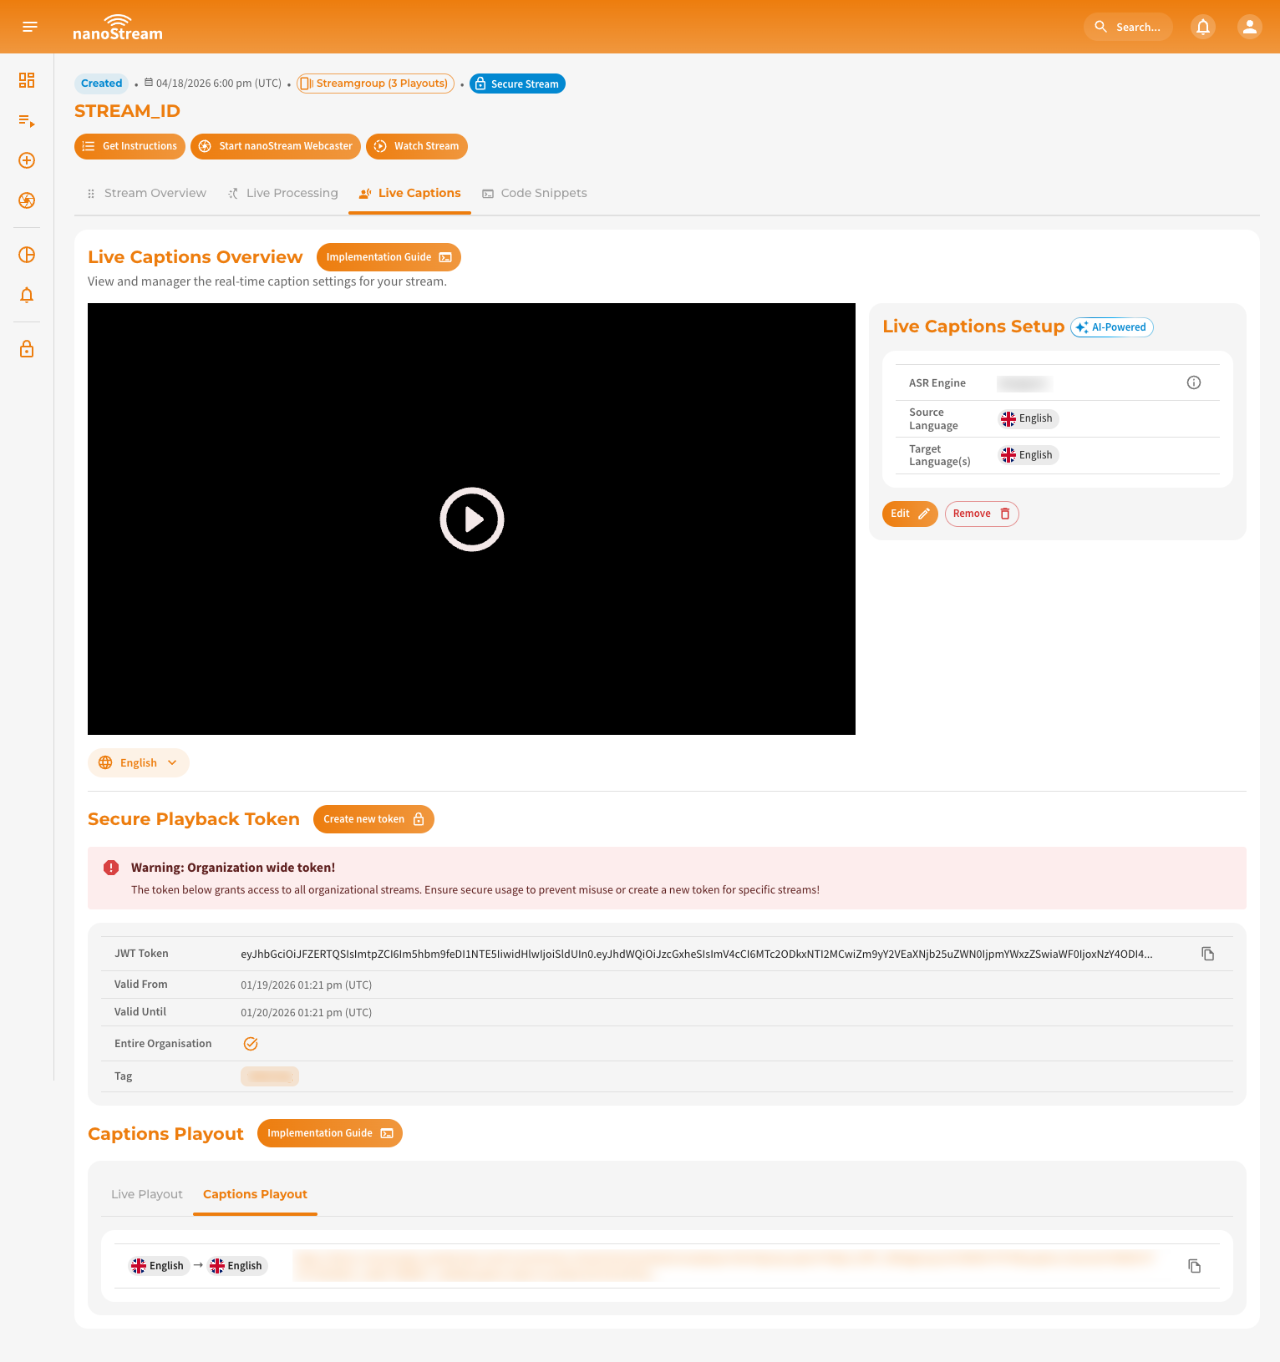
Overview of Live Captions Setup
After creating a stream, you can access Live Captions playout and code snippets in several dashboard locations:
- Stream Overview: dashboard.nanostream.cloud/stream/YOUR-STREAM-ID
- New Stream Instructions: dashboard.nanostream.cloud/stream/new/YOUR-STREAM-ID
- Playout Overview: dashboard.nanostream.cloud/playout/YOUR-STREAM-ID
- Webcaster Overview: dashboard.nanostream.cloud/webcaster/YOUR-STREAM-ID
In all these areas (except New Stream Instructions), you’ll find a dedicated Live Captions tab, which includes:
- Live Captions Player.
- Language selector below the player to switch between enabled target languages.
- Current engine, source language, and target language(s).
- Options to add, edit, or remove captions.
- Secure Playback Token with decoded informations.
- Captions Playout URLs for each target language.
 Screenshot: Live Captions Overview Tab
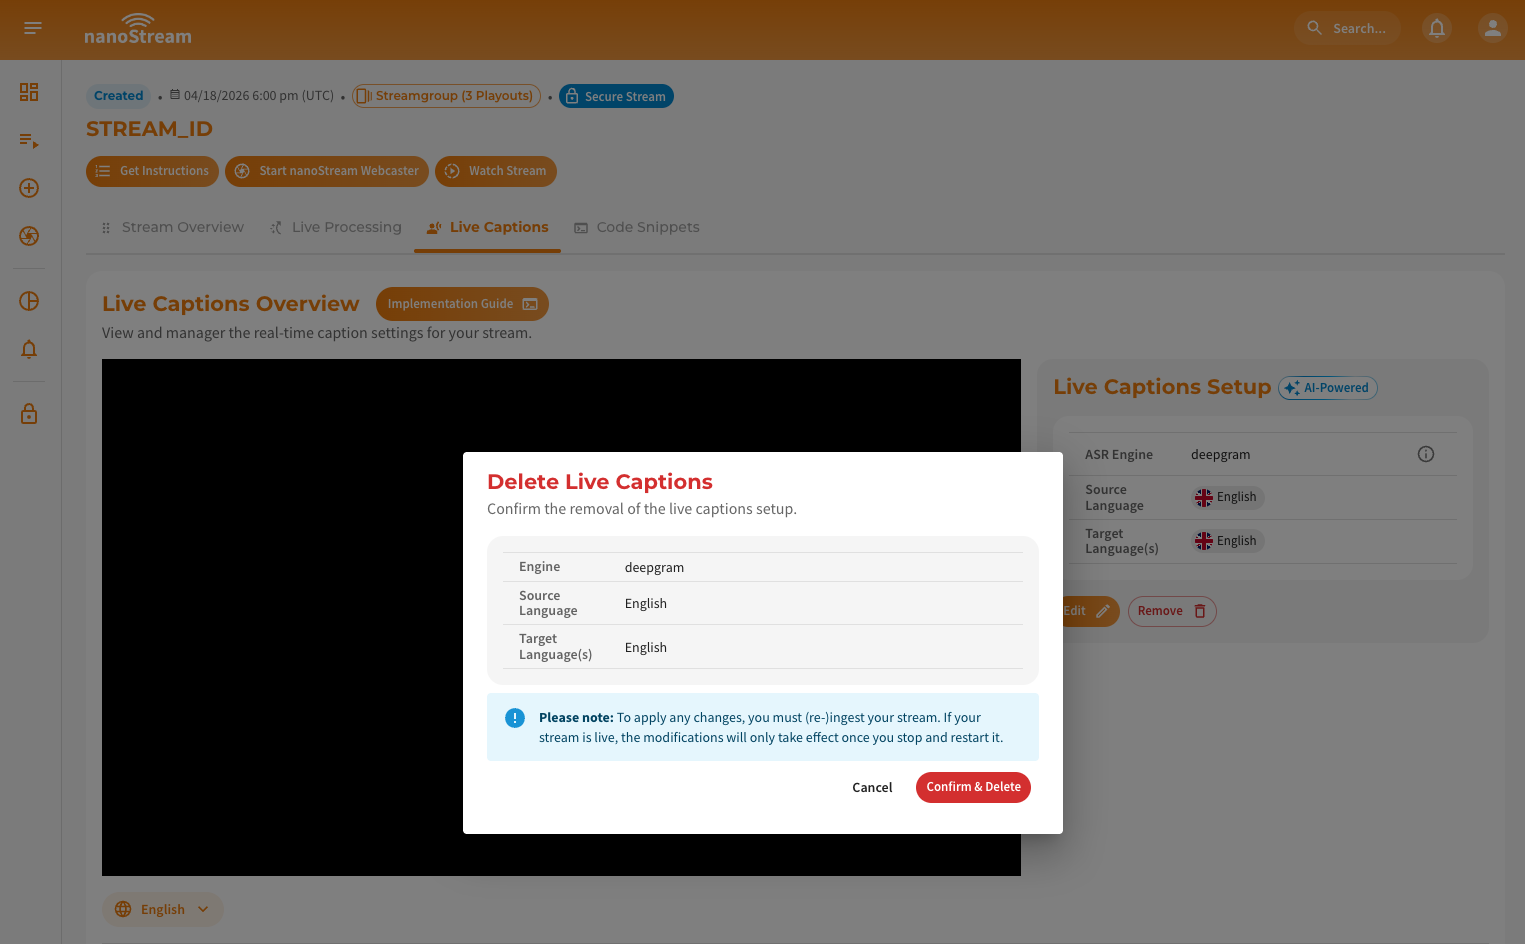
Modify Live Captions Setup
To modify existing Live Captions settings, open the Live Captions tab in any Stream Overview.
Changes only take effect after re-ingesting your stream. If the stream is live, modifications apply after stopping and restarting.
Edit Live Captions: Click Edit. Then update the engine, source language, or target languages and save your changes.
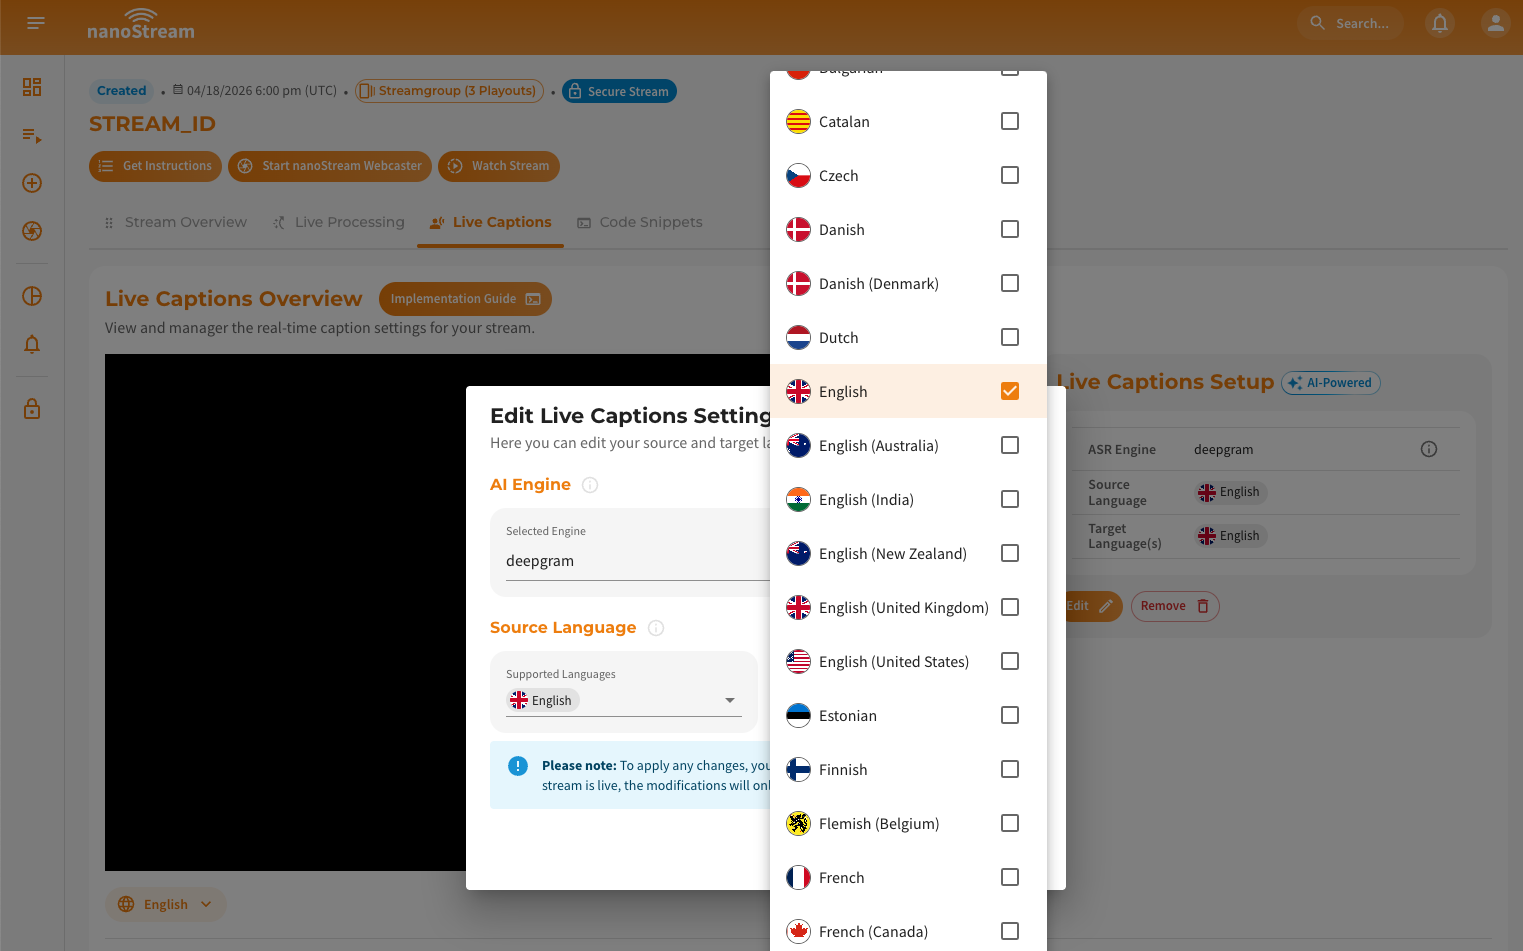 Screenshot: Editing Live Captions settings
Remove Live Captions: Click Confirm & Delete and the captions will be removed.
 Screenshot: Removing Live Captions from a stream