Live Encoding
Live encoding is the first step in every live streaming workflow. A live encoder takes your camera or screen signal, compresses it in real time (typically using H.264/AAC) and sends it to nanoStream Cloud via an ingest protocol such as RTMP, SRT or WHIP. Once received, nanoStream Cloud distributes the stream worldwide with ultra-low latency.
On this page you will learn what your encoding options are, the recommended settings, and how to connect with the most common encoders.
Live Encoding Options
nanoStream Cloud works with browser-based, software-based, and hardware-based encoders:
- Browser Encoder: nanoStream Webcaster
- Software Encoder: OBS Broadcaster Software, Wirecast, VMix, ffmpeg
- Hardware Encoder: JVC Connected Camera, Videon, Teradek, and others
Supported Formats
| Encoder | Video Codec | Audio Codec | Container |
|---|---|---|---|
| nanoStream Webcaster | H.264 | Opus | WebRTC |
| Software/Hardware Encoders | H.264 | AAC | RTMP |
| On Request | H.265, SRT, RTSP | - | – |
Encoder Setup
In this section, we have outlined the setup for the most commonly used encoders, nanoStream Webcaster, OBS, and Osprey Talon.
- nanoStream Webcaster
- OBS Studio
- Osprey Talon
The nanoStream Webcaster is a browser-based encoder that requires no installation or plugins. It is ideal for quick broadcasts live streaming setups.
You can stream directly from your browser by going to dashboard.nanostream.cloud/webcaster and creating a new stream or by selecting an existing one. Alternatively, it is possible to manually append the stream ID to the URL at any time, e.g. dashboard.nanostream.cloud/webcaster/YOUR-STREAM-ID.
Steps:
- Open the Webcaster via Dashboard → Webcaster
- Select or create a Stream
- Choose camera and microphone
- Click Start Broadcast
To learn more about how to set up the webcaster and process the stream, simply refer to our dedicated docs: Ingesting with the nanoStream Webcaster.
If you prefer to assemble the nanoStream Webcaster yourself, you can find all available methods in our Webcaster API.
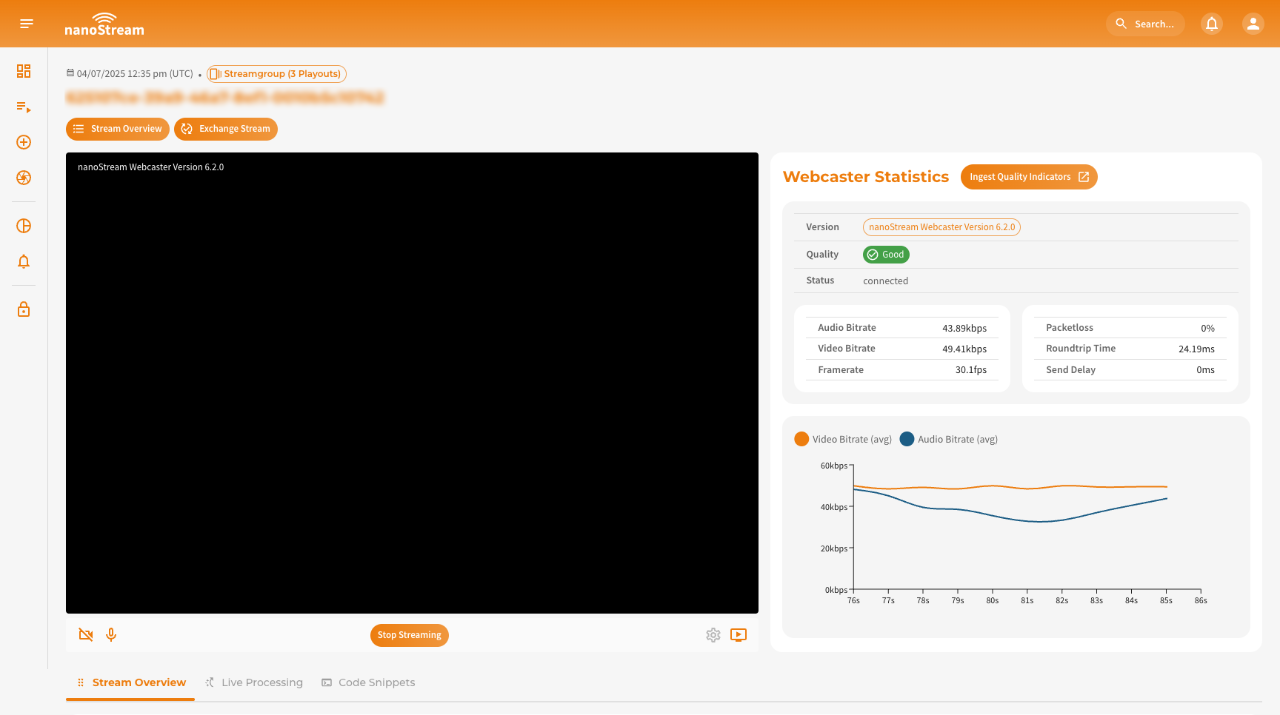 Screenshot: nanoStream Webcaster
OBS Studio (Open Broadcaster Software) is a free, powerful software for professional live streaming. It allows you to broadcast to nanoStream Cloud while giving full control over video quality, bitrate, and encoder settings.
OBS offers nanoStream Cloud as a streaming service for automatic setup, making configuration simple and fast.
Steps:
- Download & Install OBS Studio.
- Open OBS and go to
Settings → Stream. - Under Service, select
Other… → nanoStream Cloud/bintu. - Enter the Stream Key, known as Stream name in nanoStream Cloud Dashboard (e.g.,
ABCDE-XYZ12). - Configure video source (add source, arrange overlays, etc.)
- Start Streaming around the world!
- Check your nanoStream Cloud Dashboard to confirm that the live stream is running.
Learn how to start and share a stream, including the necessary steps and details for a seamless setup here.
If you need more guidance, read our extended blog post about Low Latency OBS: How to use OBS for Low Latency Live Encoding to nanoStream Cloud.
Video Tutorial: Set up OBS with nanoStream Cloud
Osprey Talon is a professional hardware encoder that allows you to broadcast high-quality, ultra-low-latency streams to nanoStream Cloud. This guide walks you through configuring your device for RTMP, SRT, and WHIP ingestion.
Step 1: Login to your Osprey Device
Access your Osprey Talon via a web browser using the device IP.
Default credentials: Username: admin / Password: osprey
Step 2: Select the Upstream Protocol
Osprey Talon supports multiple protocols for live ingest. nanoStream Cloud supports RTMP, SRT, and WHIP. You can find the appropriate ingest URL and stream name in your nanoStream Cloud Dashboard in the stream overview.
Once logged in, navigate to Output → Upstream Protocol to configure the first channel.
a) RTMP
For the most common setup:
- Select
nanocosmos (RTMP)orRTMP/RTMPSin the Protocol dropdown. - In the
Destination URL, enter your RTMP ingest URL (e.g.,rtmp://bintu-stream.nanocosmos.de/live). - Enter the Stream Key, known as Stream name in nanoStream Cloud Dashboard (e.g.,
ABCDE-XYZ12).
b) SRT
SRT provides reliable streaming over unpredictable networks and can be used as an alternative to RTMP.
- Select TS over SRT as the protocol.
- Set SRT Mode:
Caller. - Destination Address:
bintu-srt.nanocosmos.de. - Port:
5000.
SRT is ideal for low-latency streaming in challenging network conditions, as it handles packet loss and jitter automatically.
c) WHIP (WebRTC-based Ingest)
WHIP allows browser-friendly, ultra-low-latency ingest via WebRTC.
- Select nanocosmos WHIP as the protocol.
- Enter the Stream Key, known as Stream name in nanoStream Cloud Dashboard (e.g.,
ABCDE-XYZ12).
WHIP is recommended for scenarios where ultra-low latency and direct WebRTC playback are required, such as interactive webinars or live betting.
Step 3: Video Configuration & Start Your Broadcast
- Configure the video source, resolution, and encoding settings for your broadcast.
- Click
Actions → Startto begin streaming. - Check your nanoStream Cloud Dashboard to confirm that the live stream is running.
If you need more guidance, have a look at our blog post Tutorial: Osprey Talon and nanoStream Cloud.
Encoder Configuration
The visual quality of a live stream is determined primarily by two variables: resolution and bitrate.
Resolution defines how many pixels are transmitted (e.g. 1280×720), while the bitrate defines how much data per second is available to represent motion and detail (e.g. 500 kbit/s).
Both settings must be in balance, especially for low-latency environments.
Live streaming behaves differently from file-based video. Lower latency means less buffering, which reduces tolerance for unstable networks. Because of that:
| Configuration | Description |
|---|---|
| Avoid changing resolutions during a stream | For live streams, a constant pixel resolution is required, as most streaming and playback environments do not support changing resolutions while streaming. |
| Mobile networks require lower bitrates | Mobile networks have limited bandwidth and usually lead to a quality impact of a stream. If you set a high bitrate for your stream, which cannot be delivered through the network, your clients will experience buffering and stream freezes during the playback. |
| High-motion content needs more bitrate than static content | Video Encoding Quality is very much dependent on the content. Static content with little movement and structure is much better to compress than moving content. |
It is highly recommended to run your own tests based on typical content, and approve by your own quality expectations.
General Recommendations
nanoStream Cloud works with a wide range of live encoder configurations. In general, there are some common recommendations for ultra-low latency:
| Setting | Recommendation |
|---|---|
| Frame rate | 25 or 30 fps, not 60 |
| Encoder GOP Size | ~2 seconds (e.g. 50-60 frames for 25/30 fps) |
| Bitrate | Choose as low as possible, as high as necessary |
| Camera Resolution | Configure the camera with the max. resolution you would like to use for streaming, not higher. Don't capture 1080p if you stream with 720p |
| Upscaling | Avoid upscaling, it wastes bandwidth and reduces quality |
| Resolution Choice | Prefer 720p for ultra-low latency use cases |
Standard Resolutions
- 640x480 (4:3)
- 640x360 (16:9)
- 240p (424x240)
- 360p (640x360)
- 432p (768x432)
- 480p (848x480)
- 576p (720x576 or 1024x576, "SD")
- 720p (1280x720, "HD")
- 1080p (1920x1080, "Full HD")
Recommended Bitrates
| Resolution | Recommended Bitrate |
|---|---|
| ≤ 576p (up to 720x576) | ≤ 300-500 kBits/s (medium), ≥ 1000 kBit/s (high) |
| 720p HD (1280x720) | 600-1000 kBits/s (low/medium), ≥ 1000-2000 kBits/s (high) |
| 1080p Full HD (1920x1080) | ≥ 2-3 MBit/s |
| 4K (4096x2160) | ≤ 6 MBit/s |
If you expect to have audiences in bad network environments (e.g. mobile or public Wi-Fi), we suggest to reduce the bitrate to far below 1 MBit/s - (1000 kBits/s), for example 500 kBits/s.
Stream Configuration
RTMP is the default ingest format for nanoStream Cloud. You receive your RTMP ingest URL via Dashboard or API and enter it into your encoder. Any RTMP-capable encoder can be used.
To learn how to retrieve the ingest information and successfully start a stream, we have written a detailed guide. There you will once again find instructions for the most common encoders (including the nanoStream Webcaster, OBS and Osprey Talon).
Data Traffic (Bandwidth Usage)
Data traffic depends and grows with the bitrate sent from the encoder and the bitrate received for every viewer.
You can estimate the required upstream or downstream traffic per hour as:
bitrate(kbit/s) × 3600 / 8 = MB per hour
Example
| Bitrate | Approx. Data per Hour |
|---|---|
| 500 kBits/s | ~225 MB / hour |
| 1000 kBits/s | ~450 MB / hour |
Adaptive Bitrate / Multi-Bitrate Live Streaming
To adjust to network conditions, certain adaptive bitrate (ABR) configurations are available.
- Dynamic Upstream: Automatic adjustment of live encoder bitrate (dependent on your live encoder)
- Multiple Bitrates (MBR): To support multiple video quality levels, you can send multiple streams in multiple bitrates (e.g., 2000 + 500 kbit/s). You can send your own MBR stream or use our live transcoding service.
- Downstream: ABR Playback: Automatic adjustment of the quality on the player side
For ABR Playback, several live streams need to be running at the same time with different quality levels. These streams can either be created on the encoder side or on the server side by live transcoding, based on one incoming stream.
- Learn what adaptive bitrate playback and live transcoding are and how you can set them up in the nanoStream Cloud Dashboard, by clicking here.
- To understand how stream switching and ABR work on the player side, visit the player docs.
Additional resources
See the links below for recommendations by apple, youtube, vimeo and adobe: